Don’t have a backyard garden? No problem! You can grow peppers indoors using recycled plastic bottles. Whether you want to grow bell peppers, chili peppers, or sweet varieties, this compact and eco-friendly method makes it possible to cultivate fresh peppers right from your windowsill or kitchen counter. It’s ideal for small spaces and perfect for year-round gardening in any climate.
This step-by-step guide shows you how to set up an indoor pepper-growing system using common materials, minimal space, and natural light.
Why Grow Peppers Indoors?
Peppers are versatile and flavorful, and growing them indoors allows you to control their environment—no worrying about heavy rain, harsh sun, or outdoor pests. They thrive in containers, and their relatively shallow roots make them ideal candidates for plastic bottle gardening.
Using recycled bottles reduces plastic waste and allows you to grow food with very little investment. It’s a great choice for beginners, urban gardeners, and anyone looking to bring fresh produce closer to home.
What You’ll Need
To grow peppers in plastic bottles indoors, gather these materials:
-
-
1.5- or 2-liter plastic bottles (clear or colored)
-
-
-
Potting mix suitable for vegetables
-
Organic compost or slow-release fertilizer
-
Pepper seeds (choose compact or dwarf varieties for best indoor growth)
-
Sharp knife or scissors
-
Heated nail or screwdriver (to make drainage holes)
-
-
A sunny windowsill, grow light, or well-lit indoor spot
-
Watering can or spray bottle
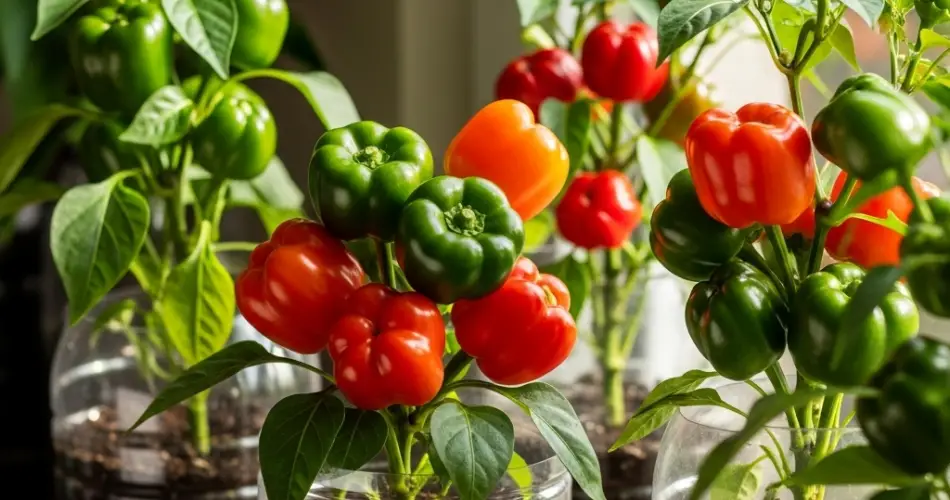
Choosing the Right Pepper Variety
For indoor growing, compact and early-producing pepper varieties are best. Some good options include:
-
‘Mini Bell’
-
‘Jalapeño’
-
‘Thai Chili’
-
‘Cayenne’
-
‘Sweet Banana’
These varieties perform well in containers and don’t require a huge root system to produce fruit.
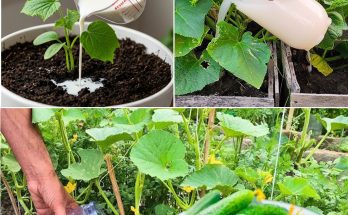
Preparing the Bottles
-
-
Clean the Bottles
Remove any labels, wash the bottles thoroughly, and allow them to dry. -
Cut the Bottles
Cut off the top third of the bottle. This creates an opening wide enough for planting. Keep the cut-off top for use as a humidity dome if desired. -
Make Drainage Holes
Use a heated nail or sharp object to poke several small holes in the bottom of the bottle for drainage.
-
-
Light Protection (Optional)
If using clear bottles, wrap them with cloth or cover with paper to prevent algae growth and protect the roots from light exposure. -
Set the Bottles in Place
Place the bottle planters on a tray or dish to catch excess water. Make sure they’re in a stable location with good light exposure.
Filling and Planting
-
-
Prepare the Soil Mix
Mix 70% potting soil with 30% compost for a nutrient-rich blend. You can also add a tablespoon of slow-release organic fertilizer.
-
-
-
Fill the Bottles
Add soil to about 2 inches below the rim, leaving room for watering. Lightly moisten the soil before sowing. -
Sow the Seeds
Place 2–3 pepper seeds in the center of the bottle. Cover them with a thin layer of soil (about ¼ inch deep) and gently press down. -
Water Gently
Use a spray bottle or fine watering can to moisten the topsoil. Keep the soil moist but not soggy during germination.
-
Light and Temperature Requirements
Peppers love warmth and sunlight. Place your bottle planters in a spot that gets at least 6 hours of direct light each day. A south-facing windowsill works best. If natural light is limited, use a full-spectrum grow light positioned about 6–8 inches above the plants.
Maintain an indoor temperature of 20–27°C (68–81°F). Avoid placing the bottles in drafty or overly cool areas.
Watering and Fertilizing
Water your peppers when the top inch of soil feels dry. Bottles tend to dry out faster than traditional pots, so check regularly. Always water from the top until you see drainage at the bottom.
Feed your plants every 2–3 weeks with diluted liquid fertilizer once they have developed a few true leaves. Use a balanced organic fertilizer or one high in phosphorus to encourage fruiting.
Supporting Growth
As pepper plants grow, they may need support to stay upright. Use a small stick or bamboo skewer to prop them up if they start leaning.
Once they reach about 6 inches tall, thin out extra seedlings and keep only the strongest plant per bottle to ensure good root development and fruit production.
Pollination Indoors
Unlike outdoor gardens, indoor peppers may need help with pollination. When flowers appear, gently shake the plant or use a cotton swab to transfer pollen between blossoms.
This small step can significantly improve your pepper yield indoors.
Harvesting
Most peppers are ready to harvest within 60 to 90 days, depending on the variety. Harvest when the fruits reach their mature color and size. Use scissors or garden shears to snip the fruits off the stem—pulling them by hand may damage the plant.
Regular harvesting encourages the plant to produce more peppers.
Final Thoughts
Growing peppers indoors in plastic bottles is a creative and sustainable way to enjoy fresh, homegrown food without a garden. It’s affordable, space-saving, and surprisingly productive. With proper light, care, and a little patience, your indoor pepper plants can reward you with a continuous harvest right from your window.
Whether you want to add a spicy kick to your meals or enjoy colorful bell peppers, this indoor bottle-growing method brings flavor and freshness straight into your home.