Why Grow Ginger Indoors?
Ginger is a tropical plant that thrives in warm, humid environments. This makes it well-suited for indoor growing where temperature and moisture can be controlled more easily. Unlike many other crops, ginger grows horizontally and needs only moderate light, making it perfect for balconies, kitchen windows, or unused corners of a room.
It’s also a low-maintenance plant that rewards patience with a generous harvest, and the lush green leaves make it a decorative addition to your indoor space.
What You’ll Need
Before you begin, gather these essentials:
-
A healthy ginger root (rhizome) with visible “eyes” or buds
-
A wide, shallow pot with drainage holes
-
High-quality potting mix rich in organic matter
-
A spray bottle or watering can
-
A warm, well-lit space with indirect sunlight
You can purchase ginger rhizomes from a garden center or use a fresh piece from the grocery store—just make sure it hasn’t been treated with growth inhibitors.
Preparing the Ginger for Planting
To prepare your ginger for planting:
-
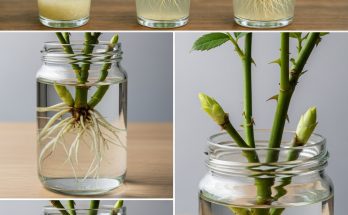
Soak the ginger rhizome in warm water for a few hours or overnight. This helps stimulate sprouting.
-
Cut the root into pieces (about 1–2 inches each) with at least one eye per piece.
-
Allow the cut pieces to dry for 24 hours to form a callus over the cut surface. This prevents rot once planted.
Choosing the Right Pot and Soil
Ginger grows outward rather than downward, so choose a wide, shallow container (at least 12 inches in diameter and 6–8 inches deep). Make sure it has drainage holes to prevent waterlogging.
Fill the pot with a well-draining potting mix, ideally one made for vegetables or herbs. A mix of potting soil, compost, and a bit of sand or perlite works well. Ginger prefers slightly acidic to neutral soil with a pH of 6.0 to 6.5.
Planting Ginger Indoors
-
-
Place the ginger pieces eyes up, about 2 inches apart.
-
Cover them lightly with 1–2 inches of soil—not too deep.
-
-
Water gently but thoroughly to moisten the soil.
Keep the pot in a warm area (70–85°F / 21–29°C). Ginger doesn’t like cold drafts or sudden temperature changes.
Caring for Your Indoor Ginger Plant
Ginger is relatively slow-growing, so patience is key. Here’s how to care for it:
-
Water lightly but consistently. Keep the soil moist, not soggy. Using a spray bottle can help control moisture levels, especially in early stages.
-
Place the pot in indirect sunlight. Bright, filtered light is ideal—avoid direct sun that can scorch the leaves.
-
Mist the leaves or use a humidity tray if indoor air is dry, especially during winter months.
-
Feed the plant with a balanced liquid fertilizer once a month during the growing season.
As the shoots grow, you can add a little more soil around the base to encourage more rhizome development.
Harvesting Ginger
Ginger typically takes about 8–10 months to fully mature. However, you can begin harvesting baby ginger (tender and milder in flavor) after about 4–6 months.
To harvest:
-
-
Gently dig into the soil at the edge of the pot and cut off a small piece of rhizome.
-
-
Cover the rest back with soil and continue watering and feeding as usual.
You can continue this partial harvest method to keep the plant producing for months.
Repotting and Propagation
Over time, your ginger plant may outgrow its pot. When this happens:
-
-
Remove the plant from the pot and divide the rhizomes into sections, each with at least one growing bud.
-
-
Replant in fresh soil using the same method as before.
This allows you to grow multiple ginger plants and enjoy a continuous supply year-round.
Final Thoughts
Growing ginger indoors in pots is a satisfying and practical way to enjoy fresh, organic produce without a garden. With the right container, soil, and care, you can transform a small, unused corner of your home into a productive little tropical oasis. Whether you’re using it in teas, stir-fries, or smoothies, homegrown ginger adds a special touch to your kitchen—and might just inspire your guests to try it too.