Pothos, how to grow it in a jar: the step-by-step procedure
We reveal a revolutionary method to grow your photos directly inside a jar, even if you live in an apartment.
Here is the most incredible method to grow a photo without being a true expert gardener; the result will be truly amazing.
All properties of the photos
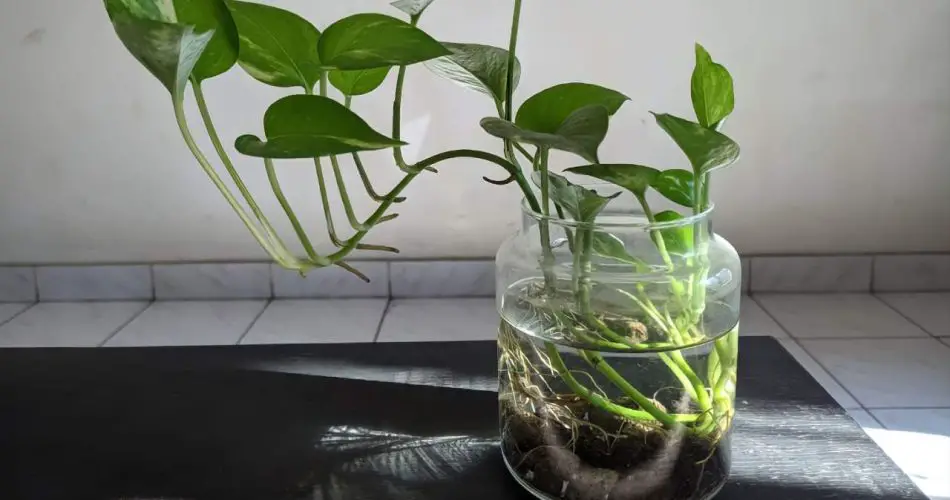
The photo shows a plant belonging to the Araceae family, native to the tropical forests of the Americas. This plant is very popular as a houseplant due to its beauty and air-purifying properties. In this article, we will explore its properties and the reasons why you should consider adding this plant to your collection.
The plant pictured has an elegant and sophisticated appearance, with its oval, glossy leaves growing on tall stems. It’s also easy to grow, suitable even for beginners. The plant requires plenty of light, but not direct sunlight, and well-drained, fertilized soil to thrive.
One of the main benefits of photo murals is their ability to purify the air . NASA has conducted a study on air purification by plants and discovered that they can remove pollutants such as benzene, formaldehyde, and trichloroethylene. These pollutants are often found indoors, so having them in your home can help improve the air quality you breathe.
In addition to its air -purifying properties , phosphatase also has medicinal properties. The plant contains active compounds such as the glucoside arudin, which is known for its anticoagulant effect and can be used to prevent cardiovascular problems. Furthermore, phosphatase extract has been used as a traditional remedy for treating various ailments, including headaches, nausea, fever, and rheumatism.
Finally, it’s also known for its ability to boost productivity and reduce stress . One study showed that incorporating office plants, such as photos, led to increased employee productivity and well-being.
The photo shows a beautiful and easy-to-grow plant that offers many health and environmental benefits. If you’re looking for a plant for your home or office, this is definitely an excellent choice to consider. Not only does it look great, but it can also improve air quality, provide health benefits, and boost productivity.
Here’s how to grow it in a jar.
The photo plant is a popular choice for anyone looking to add some greenery to their home or office. One of its distinguishing features is that it can be grown in glass jars or terrariums, making it an ideal plant for those with limited space. Below, we’ll guide you step-by-step on how to grow a photo plant in a jar.
Choose your jar and potting soil . The size of the jar depends on the size of the plant, but a clear glass jar is excellent for displaying the roots and soil. Be sure to use fertile, well-draining potting soil, as the photo requires good drainage to prevent root rot.
Photos of plants . It’s an easy plant to grow and can be planted directly in the jar. Place the plant in the middle of the jar and cover it with potting soil, gently pressing it down around the roots.
Add gravel or activated charcoal. Gravel or activated charcoal will help keep the soil cool and prevent soil compaction. Add a layer of gravel or activated charcoal approximately 1.5 cm above the potting soil.
Add a little water . Pour water into the bottom of the jar so that it reaches the level of the gravel or activated charcoal. Be careful not to add too much water, as this could cause root rot.
Place your plant in a well-lit area . Phototherapy requires plenty of light for photosynthesis, so place the jar in a bright area, but not in direct sunlight. Direct sunlight can burn the phototherapy leaves.
Keep your photos hydrated. Check the water level in the jar regularly and make sure the soil stays moist but not soggy. If the soil gets too dry, add a little water to the bottom of the jar.
Pruning and care . The photo may look a bit large for the jar, so prune the plant regularly to keep its size under control. Also, remember to feed the plant with a plant fertilizer every 2 or 3 months to help maintain its health and vitality.