Growing Watermelon on the roof, crazy idea but the result is really unexpected
Growing Watermelon on the Roof – A Crazy Idea with Unexpected Results!
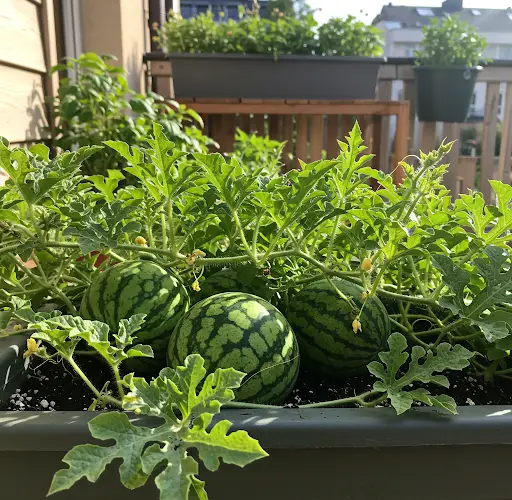
Growing watermelons on the roof may sound like a wild idea, but the results can be truly astonishing! With the right approach, you can transform your rooftop into a productive garden, yielding sweet, juicy watermelons even in a limited space. If you are wondering how to grow these delicious fruits on your roof, this guide will take you through the process step by step.
Why Grow Watermelon on the Roof?
Many urban gardeners struggle with space constraints, but rooftops provide a perfect alternative for growing plants, including watermelons. Here’s why growing watermelons on the roof is a great idea
- Maximizes Space: Utilizes unused rooftop areas for gardening.
- More Sunlight: Rooftops get plenty of direct sunlight, ideal for watermelons.
- Improves Temperature Control: The warm rooftop environment helps plants thrive.
- Reduces Heat in Your Home: Greenery on the roof provides insulation and lowers temperatures indoors.
- Organic and Chemical-Free: You can grow healthy, pesticide-free watermelons for your family.
Step 1: Choosing the Right Watermelon Variety
When growing watermelons on the roof, selecting the right variety is crucial. Compact or small-fruit varieties work best for container gardening. Here are some great options:
-
- Sugar Baby: A small, sweet variety perfect for containers.
- Golden Midget: A fast-growing variety with golden skin.
- Icebox Watermelon: Produces smaller fruits that fit easily in small spaces
- Charleston Gray: Ideal for warm climates but needs sturdy support.
- Crimson Sweet: Larger fruit but manageable with proper care.
Step 2: Selecting the Right Container and Soil
Since rooftop gardening requires controlled planting, choosing the right container and soil mix is essential
Container Selection
-
- Use large grow bags, pots, or wooden crates with a minimum 20-25 gallon capacity.
- Ensure the container has proper drainage holes to prevent waterlogging.
- A raised garden bed can also work if your rooftop can support the weight.
Soil Preparation
Watermelons thrive in well-draining, nutrient-rich soil. Prepare the best soil mix
- 40% Garden Soil: Provides structure for plant roots.
- 30% Compost: Enriches the soil with organic nutrients.
- 20% Sand or Perlite: Improves drainage and aeration.
- 10% Coco Coir or Peat Moss: Helps retain moisture while keeping the soil light.
- pH Level: Slightly acidic to neutral (6.0-7.0) is ideal.
Step 3: Planting Watermelon Seeds or Seedlings
You can grow watermelons from either seeds or seedlings.
Starting from Seeds
-
- Soak the Seeds: Soak them in warm water for 6-8 hours to boost germination.
- Plant the Seeds: Sow 1-2 seeds per container, about 1 inch deep in the soil.
- Provide Warmth: Keep the soil temperature between 75-85°F (24-29°C) for best germination.
- Germination Time: Seeds sprout in 7-10 days.
Starting from Seedlings
- Choose Healthy Seedlings: Select strong plants with at least 3-4 true leaves.
- Transplant Carefully: Avoid disturbing the roots and plant them in well-prepared soil.
Step 4: Providing Proper Sunlight and Support
- Sunlight: Watermelons need 6-8 hours of direct sunlight daily.
- Trellis Support: Rooftop gardens benefit from vertical growing methods. Use strong trellises or nets to support vines and fruits.
- Hammocks for Fruits: Use cloth slings or net bags to hold hanging watermelons and prevent breakage.
Step 5: Watering and Fertilizing Watermelon Plants
Watering Tips
-
- Water Deeply: Watermelons require deep watering 2-3 times per week.
- Avoid Overwatering: Too much water can cause root rot.
- Mulching: Add a layer of straw or dried leaves to retain soil moisture.
Fertilizing for Maximum Growth
-
- Early Growth Stage: Use a balanced fertilizer (10-10-10) every 2 weeks.
- Flowering Stage: Increase phosphorus and potassium for fruit development.
- Organic Boost: Add compost tea or banana peel fertilizer for natural nutrients.
Step 6: Pollination for More Fruits
Watermelons need pollination to produce fruit.
- Hand Pollination: If natural pollinators are absent, use a small brush to transfer pollen from male to female flowers.
- Attract Bees: Plant flowers like marigolds or basil nearby to encourage bees and butterflies.
Step 7: Managing Pests and Diseases
Even on the rooftop, watermelon plants can face pest problems.
- Aphids & Spider Mites: Spray neem oil or insecticidal soap.
- Powdery Mildew: Prevent by watering at the base and providing good air circulation.
- Fungal Diseases: Avoid overwatering and keep leaves dry.
Step 8: Harvesting Watermelons at the Right Time
Knowing when to harvest is essential to enjoy the best-tasting watermelon.
- Check the Tendrils: When the tendril near the fruit turns brown and dries, the fruit is ripe.
- Thumping Test: A ripe watermelon sounds hollow when tapped.
- Yellow Spot: A creamy yellow patch on the bottom means it’s ready to pick.
Use a sharp knife to cut the fruit, leaving a small portion of the stem attached
Bonus: Storing and Enjoying Your Homegrown Watermelons
- Whole Melons: Store in a cool place for up to 2 weeks.
- Cut Pieces: Refrigerate in airtight containers for 5-7 days.
- Creative Uses: Enjoy in fruit salads, smoothies, or fresh juice!
Common Mistakes to Avoid
-
- Planting in Small Containers: Watermelons need large space for root growth.
- Overcrowding Plants: Ensure proper spacing for better air circulation.
- Neglecting Pollination: No pollination leads to fewer fruits.
- Skipping Support: Hanging fruits need slings to prevent damage.
Growing watermelons on the roof may seem like an unusual idea, but with the right approach, it’s incredibly rewarding. Whether you have limited ground space or just want to try something new, rooftop watermelon gardening offers a unique way to enjoy fresh, juicy melons. Follow these steps, and you’ll be amazed at the unexpected results – a bountiful harvest right from your rooftop! Happy gardening!