How to easily grow okra at home
How to Grow Okra at Home: A Simple Guide for Beginners
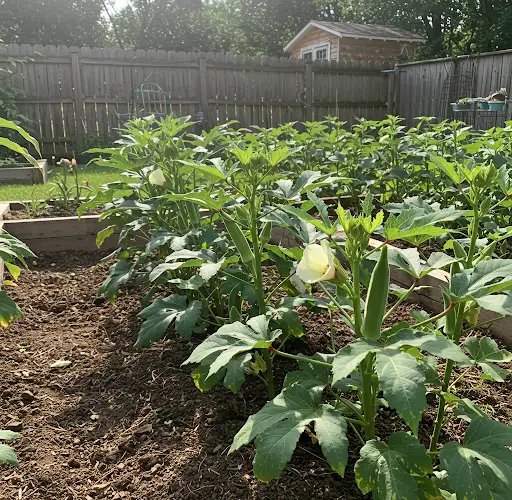
Okra, also known as lady’s finger, is a warm-season vegetable loved for its tender pods and high nutritional value. Growing okra at home is not only easy and rewarding but also a great way to enjoy fresh, organic produce right from your garden, balcony, or rooftop. Even if you don’t have a large yard, okra can be grown successfully in pots or grow bags with a little attention and care.
This article walks you through everything you need to know to grow okra at home—from choosing the right spot to harvesting your pods.
Why Grow Okra at Home?
Okra is an excellent vegetable for home gardeners because:
-
It grows well in containers or directly in the ground.
-
It thrives in hot and sunny conditions.
-
It produces continuously throughout the growing season.
-
It’s pest-resistant and low-maintenance.
-
The fresh pods are more tender and flavorful than store-bought versions.
Plus, homegrown okra is free of harmful chemicals, making it a healthy choice for your meals.
What You’ll Need
Before getting started, gather the following materials:
-
-
Okra seeds (choose a variety suited to your climate)
-
-
A pot or grow bag (minimum 12 inches deep)
-
Well-draining potting mix or garden soil enriched with compost
-
Watering can or spray bottle
-
Organic fertilizer or compost
-
A sunny location (receives 6–8 hours of sunlight per day)
Step-by-Step Guide to Growing Okra at Home
1. Choose the Right Container or Location
If you’re planting in the ground, select a sunny spot with good drainage. For container gardening, use a pot or grow bag that is at least 12 inches deep. Okra has a long taproot and needs depth to grow properly.
Make sure your container has drainage holes to prevent waterlogging.
2. Prepare the Soil
Okra prefers well-drained, slightly sandy soil rich in organic matter. Mix equal parts of garden soil, compost, and sand or cocopeat. The soil pH should be between 6.0 and 6.8.
Before planting, you can add compost or aged manure to enrich the soil.
3. Sow the Seeds
Soak okra seeds in warm water overnight to soften the outer coating and improve germination. Sow 2–3 seeds directly into the soil, about 1 inch deep. If you’re planting in rows, space the seeds 12–18 inches apart.
In containers, plant one seed per pot or two seeds in a grow bag, thinning later to the strongest seedling.
Germination typically takes 5–10 days depending on temperature.
4. Provide Proper Sunlight and Watering
Place your okra pots in a location that gets full sun for at least 6 hours daily. Water regularly to keep the soil moist, especially during the germination period. Once established, okra is somewhat drought-tolerant, but regular watering will improve pod production.
Avoid overwatering, which can lead to root rot. Water at the base of the plant to prevent fungal issues on leaves.
5. Fertilizing
Feed your okra plants every two to three weeks with compost tea or a balanced organic fertilizer. Once the plants begin to flower, switch to a fertilizer higher in phosphorus and potassium to support pod development.
Mulching with dry leaves or straw can help retain moisture and suppress weeds.
6. Support and Pruning
Okra plants generally grow upright and may not need support. However, if your variety grows tall or is exposed to strong winds, staking may be helpful.
Pruning is optional but can be done to encourage bushier growth. Pinching off the top of the plant when it’s about 12–18 inches tall can result in more branching and, in turn, more pods.
Harvesting Okra
Okra pods grow quickly and can be harvested just 2–3 days after flowering. Pick the pods when they are 2–4 inches long and still tender. If left on the plant too long, they become tough and fibrous.
Use scissors or a sharp knife to cut the pods, taking care not to damage the stem or plant.
Harvest every other day to encourage the plant to keep producing.
Common Problems and Solutions
-
-
Yellowing Leaves: May indicate overwatering or poor drainage. Check soil moisture and drainage holes.
-
-
Pest Infestation: Aphids, whiteflies, and spider mites can occasionally appear. Use neem oil spray or homemade garlic-chili spray to control them.
-
Fungal Diseases: Powdery mildew or leaf spots can occur in humid conditions. Water early in the day and avoid wetting the foliage.
Companion Plants for Okra
Growing okra alongside certain plants can improve productivity and reduce pest problems. Great companion plants include:
-
Basil: Helps repel pests.
-
Marigold: Deters nematodes and attracts pollinators.
-
Peppers: Share similar soil and sunlight needs.
Avoid planting okra near potatoes or fennel, which may inhibit its growth.
Final Thoughts
Growing okra at home is a rewarding and relatively simple gardening project, whether you’re a beginner or a seasoned green thumb. With minimal space and effort, you can enjoy a steady supply of fresh, tender pods throughout the warm season. The satisfaction of harvesting vegetables from your own garden—free from chemicals and packed with flavor—is hard to beat.
So grab a few seeds, find a sunny corner, and start your home okra garden today. Happy growing!