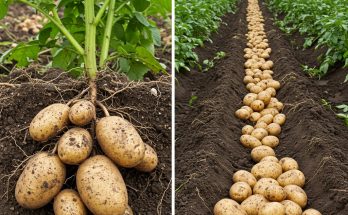
Think you need a big backyard to grow your own potatoes? Think again. Potatoes thrive in containers, making them an excellent choice for gardeners with limited space. Whether you’re working with a small patio, balcony, or rooftop garden, you can still enjoy homegrown potatoes—fresh, flavorful, and pesticide-free.
Potatoes are one of the most rewarding crops to grow. With just a pot, soil, and some seed potatoes, you can harvest a surprising number of spuds with very little effort. Container growing even allows for cleaner harvests and fewer problems with pests and diseases.
Why Grow Potatoes in Pots?
Growing potatoes in pots comes with several benefits:
-
-
Space-efficient – Ideal for small urban spaces
-
Portable – Move your pots for better sunlight or protection from harsh weather
-
Fewer pests and diseases – Less exposure to common soil-borne issues like blight
-
-
-
Easier harvests – Just dump out the pot and collect your potatoes
-
Custom soil – You control the soil quality and drainage
-
Great for beginners – Simple setup and high success rate
-
Whether you’re growing for fun or aiming to supply your kitchen, potatoes in pots are a practical gardening solution.
Choosing the Right Potato Variety
When selecting a variety for container growing, look for early or second-early types, which are well-suited to confined spaces and mature quickly. Some great choices include:
-
-
Yukon Gold – Popular yellow-fleshed potatoes, good yield
-
Red Pontiac – Great flavor and stores well
-
-
-
Charlotte – Waxy texture, perfect for salads
-
Norland – Early red-skinned variety
-
Fingerling – Small, elongated potatoes with buttery flavor
-
Avoid supermarket potatoes, as they may be treated to prevent sprouting. Instead, use certified seed potatoes from a garden center or seed supplier.
What You’ll Need
Gather these items before planting:
-
-
A container at least 12–18 inches deep and wide, with drainage holes
-
Seed potatoes (cut into chunks with 1–2 eyes each, if large)
-
-
-
High-quality potting mix (avoid garden soil)
-
Compost or aged manure
-
Watering can or hose with gentle spray
-
-
Optional: straw or mulch
Step 1: Prepare Your Container
Choose a large pot, grow bag, bucket, or even a tall storage tub—anything that holds at least 10–15 gallons of soil and drains well. The larger the container, the more potatoes you can grow.
Fill the bottom third of the container with a mix of potting soil and compost. Moisten the soil lightly before planting.
Step 2: Plant the Seed Potatoes
Place seed potato chunks (cut side down, eyes up) on top of the soil, spaced about 6 inches apart. Cover them with 4–6 inches of soil. As the plants grow, you’ll continue to add soil around them in a process called “hilling.”
Leave at least 4 inches of space between the soil surface and the container rim for this purpose.
Step 3: Sunlight and Watering
Potatoes need at least 6–8 hours of sunlight daily. Choose a sunny spot where the plants can get full exposure throughout the day.
Water regularly to keep the soil evenly moist but not soggy. Containers dry out faster than garden beds, especially in warm weather, so check daily. Inconsistent watering can cause deformed tubers or low yields.
Step 4: Hilling Up
As the green shoots grow to about 6 inches tall, cover the stems with more soil or compost, leaving the top few inches exposed. This encourages more tubers to form along the buried stems.
Repeat this process every time the plants grow taller until your container is nearly full. You can also use straw or a light mulch instead of soil for hilling.
Step 5: Feeding and Maintenance
Potatoes are heavy feeders. If your soil is not rich in compost, supplement with an organic fertilizer every 3–4 weeks during the growing season. Choose a fertilizer higher in potassium to support tuber development.
Remove any flowers that appear if you want the plant’s energy to go toward root production rather than seed formation.
Keep an eye out for pests like aphids or potato beetles, though these are less common in containers.
Step 6: Harvesting
Potatoes are ready to harvest about 10–12 weeks after planting for early varieties, or when the plants flower and the leaves begin to yellow and die back.
For “new potatoes,” harvest earlier, while the plants are still green. For larger, mature potatoes, wait until the tops have fully died down.
To harvest, simply tip the pot over and sift through the soil. Be gentle to avoid damaging the skins. Let the potatoes air dry in a shaded area before storing.
Final Thoughts
Potatoes grown in pots are a fun and productive way to maximize your garden space. With just a bit of soil, sunshine, and patience, you can enjoy a bountiful harvest right from your balcony or patio.
Container-grown potatoes are clean, easy to manage, and perfect for gardeners of all skill levels. Whether you’re growing fingerlings for roasting or red-skinned spuds for salads, growing potatoes in pots is a satisfying way to grow your own food—even without a garden.

