This guide walks you through a beginner-friendly method for growing potatoes at home that produces many tubers and leads to a successful, bountiful harvest.
Why Grow Potatoes at Home?
Potatoes are one of the most popular root vegetables in the world and a staple in many diets. Growing them at home ensures a chemical-free, fresh supply and gives you the chance to enjoy unique varieties not always available in stores. Homegrown potatoes also tend to taste richer and more flavorful than store-bought ones.
Best of all, they’re low-maintenance and very productive—even with minimal space.
Choosing Seed Potatoes
Start by selecting certified seed potatoes rather than grocery store potatoes, which may be treated to prevent sprouting. Seed potatoes are disease-free and come in many varieties, from waxy to starchy types, and early to late-season growers.
If you’re limited on space, choose early or mid-season varieties that mature faster and are ideal for container growing.
Tip: Let your seed potatoes sprout before planting. Place them in a well-lit, dry spot for 1–2 weeks until shoots (called “chits”) are about 1 inch long.
Materials You’ll Need
-
-
Seed potatoes
-
-
-
Large container, grow bag, or garden bed
-
Rich, loose soil or compost
-
Mulch or straw (optional)
-
Trowel or small shovel
-
Watering can or hose
-
Step-by-Step Guide to Growing Potatoes at Home
1. Prepare the Soil or Container
Potatoes grow best in loose, well-draining soil rich in organic matter. If planting in the ground, loosen the soil to a depth of 12 inches. Mix in compost or aged manure for a nutrient boost.
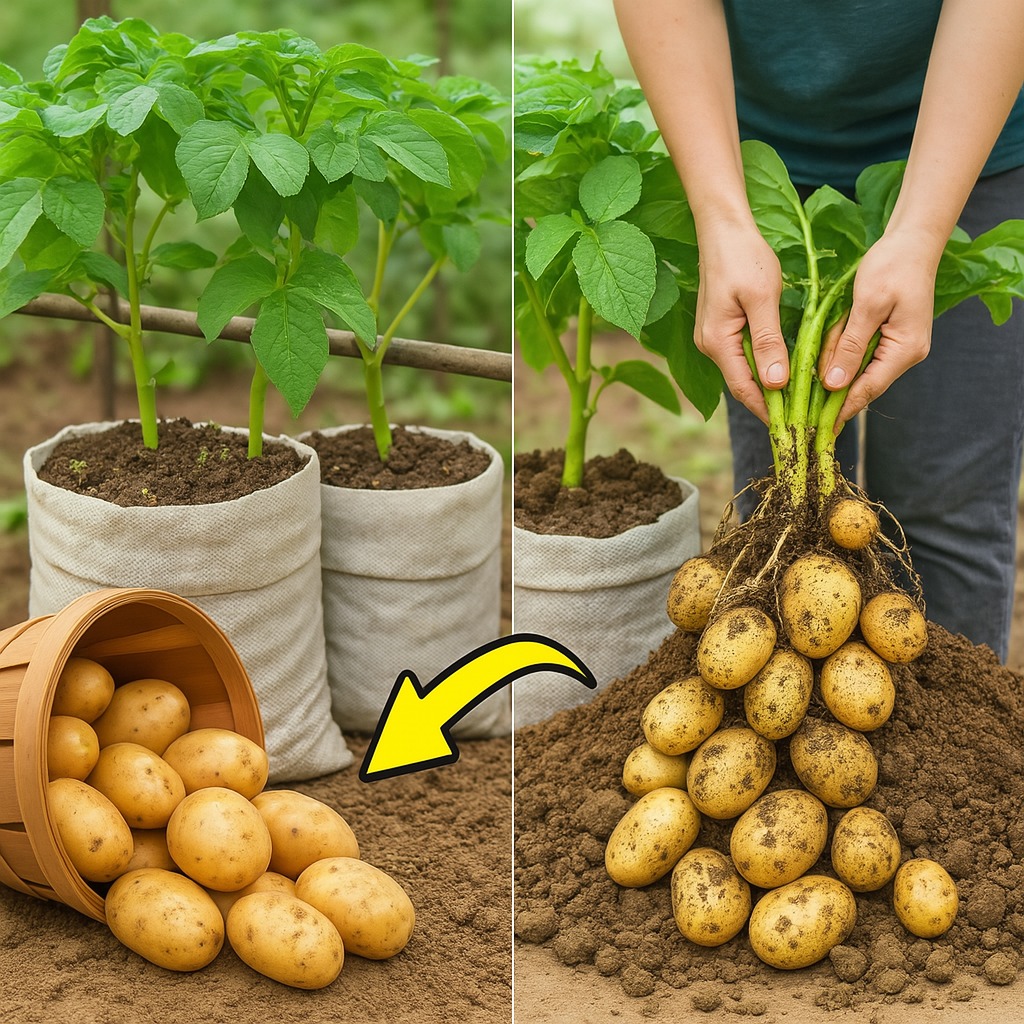
For containers, choose pots or bags at least 12–16 inches deep and wide. Fill the bottom third with quality potting soil or compost.
2. Plant the Seed Potatoes
Once your seed potatoes have sprouted, cut large ones into chunks, making sure each piece has at least one strong “eye” or sprout. Let the cut pieces dry for a day to prevent rotting.
Plant them with the sprouts facing upward, about 4–6 inches deep and 12 inches apart in beds, or 3–4 pieces per large container. Cover them with 3–4 inches of soil.
3. Water Regularly
Keep the soil evenly moist but not soggy. Potatoes need consistent moisture during tuber formation, especially once flowering begins. Water when the top inch of soil feels dry, and ensure good drainage to avoid rot.
4. Hill the Plants for More Tubers
As your potato plants grow to about 6–8 inches tall, cover the stems halfway with more soil, straw, or mulch. This process, known as “hilling,” encourages the plant to form more tubers along the buried stem.
Repeat this every couple of weeks as the plants grow taller, keeping the developing tubers covered to prevent greening and exposure to sunlight.
5. Provide Sunlight and Nutrients
Potatoes love the sun. Ensure your growing spot receives at least 6 hours of sunlight daily. Feed your plants every 3–4 weeks with a balanced organic fertilizer or compost tea to promote healthy growth and larger tubers.
6. Monitor for Pests and Diseases
Keep an eye out for common pests like aphids and Colorado potato beetles. Remove them by hand or use organic sprays if needed. Avoid overwatering to prevent fungal diseases like blight.
Crop rotation and starting with disease-free seed potatoes greatly reduce the risk of problems.
When and How to Harvest
Potatoes are usually ready to harvest about 10–12 weeks after planting for early varieties and up to 20 weeks for main crop types. The leaves will yellow and die back when the tubers have matured.
Here’s how to harvest:
-
-
For new potatoes: Harvest when the plants flower, gently digging around the base for small, tender tubers.
-
For full harvest: Wait until the foliage completely dies. Use a garden fork or your hands to carefully lift the soil and reveal your potatoes.
-
Let the harvested potatoes dry in a cool, shaded spot for a few hours before storage.
Storage Tips
Store potatoes in a dark, cool, and dry place with good air circulation. Avoid refrigeration, as it can turn the starches into sugars. Don’t wash potatoes before storing—simply brush off excess dirt.
Properly cured and stored potatoes can last several months.
Final Tips for Big Harvests
-
-
Use loose, well-draining soil to allow tubers to expand freely.
-
Hill regularly to increase yield and prevent sun exposure.
-
Choose disease-resistant varieties to minimize problems.
-
Save some small healthy tubers from your harvest for the next growing season.
-
With just a bit of effort, growing potatoes at home can be highly productive and deeply satisfying. Whether in garden beds, containers, or grow bags, this method allows anyone to enjoy a big harvest of fresh, homegrown potatoes.