In this guide, we will take you through the entire process of growing peanuts, from sowing to harvesting, so that you can enjoy your homegrown peanuts with ease.
Understanding Peanuts and Their Growth Requirements
Peanuts (Arachis hypogaea) belong to the legume family but are cultivated similarly to potatoes. During their growth cycle, they require periodic mounding or hilling to encourage pod development in the soil. Once the pods are extracted, proper drying is necessary for successful long-term storage.
Peanuts are a heat-loving crop and should be planted as soon as the danger of frost has passed. Typically, this occurs in April, but the exact timing depends on local weather conditions. Peanuts thrive in well-drained, light soils rich in organic matter, such as compost, manure, dried leaves, or dry grass. Since they love the sun, it is essential to choose a location with full sun exposure.
Preparing the Soil and Sowing the Seeds
To begin, prepare the ground by digging furrows or creating planting beds. Since peanuts need nutrient-rich soil, add a layer of manure before planting. However, to prevent burning the seeds, cover the manure with a thin layer of soil before sowing.
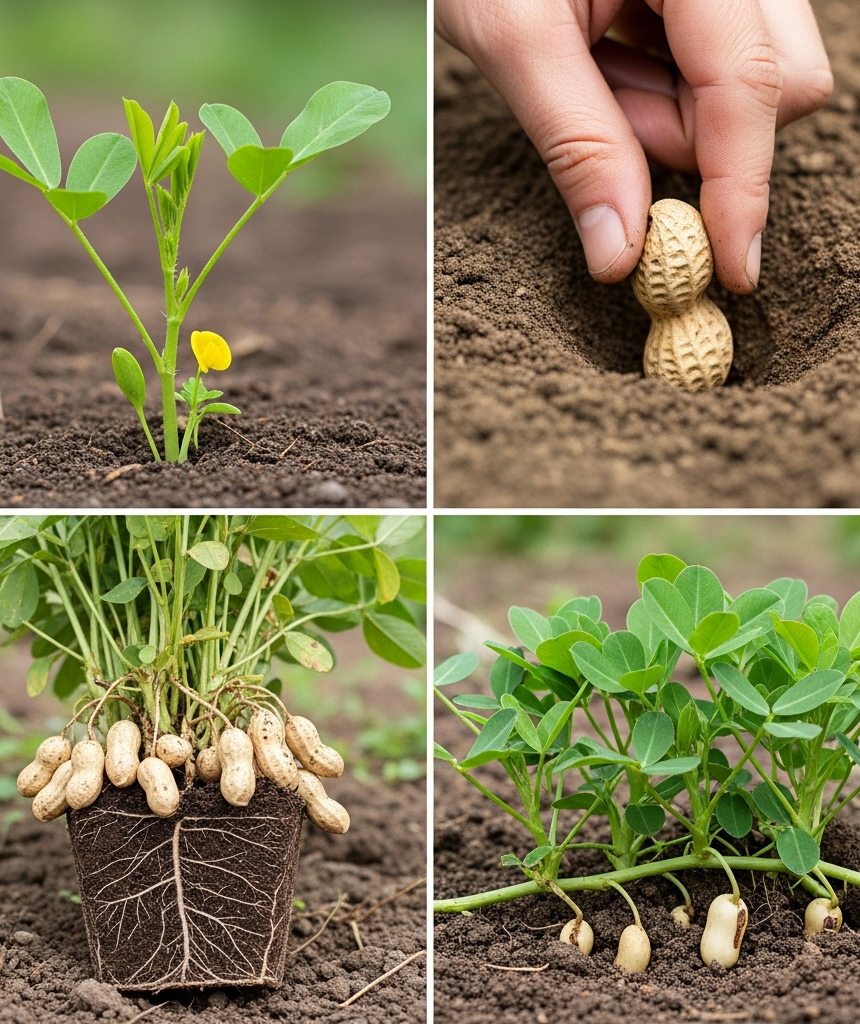
Choosing Sowing Material: You can use whole peanut pods, shelled seeds, or broken seeds for sowing. Whole pods take the longest to sprout. To accelerate germination, soak the pods in water for 24 hours, then allow them to dry slightly before planting. Peeled seeds germinate the fastest, making them the preferred option for planting.
Sowing Technique:
-
- You can either plant individual seeds at short intervals or place three to five seeds in one planting hole at a depth of 5 to 7 cm.
- The recommended spacing is 20 cm between plants and 50 to 60 cm between rows.
- Peanuts require loose, well-aerated soil with adequate lime content. They do not tolerate compacted, overly moist, or highly acidic soils.
- Whether planting in rows or clusters, ensure that the soil is well-covered and the seeds are buried at the right depth.
Caring for Peanut Plants
Weed Management and Mulching: Weeds can hinder peanut growth, especially during the early stages. The first mulching should be done when plants reach about 15 cm in height to suppress weed growth. Mulching should be repeated three to four times during the growing season. You can either pile a thin layer of soil around the plants to cover the flowers or use organic mulch such as straw.
Nutrient Requirements: Peanuts are sensitive to calcium deficiency, and if the soil lacks this mineral, it should be added at the beginning of the flowering stage. Flowers begin to bloom 30 to 50 days after sowing, depending on the variety. During flowering, it is important to provide phosphorus and potassium fertilizers, or alternatively, use wood ash as a natural source of nutrients.
Irrigation and Growth Support: Peanut plants require moderate irrigation, particularly between June and August. Proper watering encourages strong root development and enhances pod formation. Since peanut flowers bloom near the soil surface, plants must be mounded to help the flower stalks penetrate the ground, where pods will develop. If plants are not properly mounded, the flowers may dry out, reducing yield.
Monitoring Peanut Growth and Harvesting
Peanuts have an extended flowering period, and fertilized flowers gradually send their stalks into the soil, where the pods develop. This process underscores the need for maintaining loose, well-aerated soil to facilitate pod formation.
End of the Growing Season: By late summer, fertilization should be stopped as the plants have already accumulated sufficient nutrients. Watering should also be adjusted based on prevailing weather conditions to prevent excess moisture, which can lead to rot.
Signs of Maturity:
-
- The first sign that peanuts are nearing maturity is the yellowing of the leaves.
- At full maturity, the leaves dry up, and the plant’s stem turns dark.
- Harvesting should ideally take place before the first autumn frost, as peanut pods require time to fully develop underground.
Harvesting and Drying Peanuts
During harvest, carefully dig up the plants, shaking off excess soil. Collect any loose pods left in the ground and dry them separately. The harvested plants should be tied into small bundles and hung upside down in a well-ventilated area for two to three weeks. Ideally, the drying area should be under a roof, and temperatures should not drop below 0°C.
Post-Harvest Processing: After drying, the peanut pods gain weight and fully mature. They should be separated from the plants and stored in mesh bags for easy washing. The pods must be washed under running water and dried before storage to prevent mold formation and decay.
Drying Methods:
-
- Using an Electric Dryer: Spread the pods in a thin layer (about 10 cm thick) and dry them at 60°C for two days.
- Traditional Drying: Households with wood stoves can dry peanuts by spreading them on a baking tray in a 15 cm thick layer near the oven. Stir them occasionally for two weeks.
Storing Peanuts
Well-dried peanut pods should be stored in mesh or canvas bags in a well-ventilated area. Under proper storage conditions, they can last up to a year. Peeled peanut seeds, however, should be stored in airtight containers such as glass jars or ceramic containers and can last for approximately six months.
Conclusion
Growing peanuts is an enjoyable and rewarding process with minimal special requirements. Whether you have a spacious garden or a small balcony, you can successfully cultivate peanuts, even in a jar. The entire process, from planting to harvesting, is relatively straightforward, and the joy of enjoying homegrown peanuts is unmatched. Not only will you have a delicious, nutritious snack, but you will also take pride in having grown it yourself!