Step 1: Disinfecting the Orchids with Turmeric Powder
Before repotting, I will use turmeric powder to disinfect the orchids and provide them with essential vitamin support. Turmeric is particularly beneficial in repairing diseased orchid roots. To prepare the turmeric solution, I take about a teaspoon of turmeric powder and add it to a glass. Then, I pour 200 ml of boiling water over it and stir the mixture well. I will let this sit in a cool place for about 30 minutes to allow it to cool down before using it on the orchids.
Step 2: Removing the Old Soil and Pruning Orchid Branches
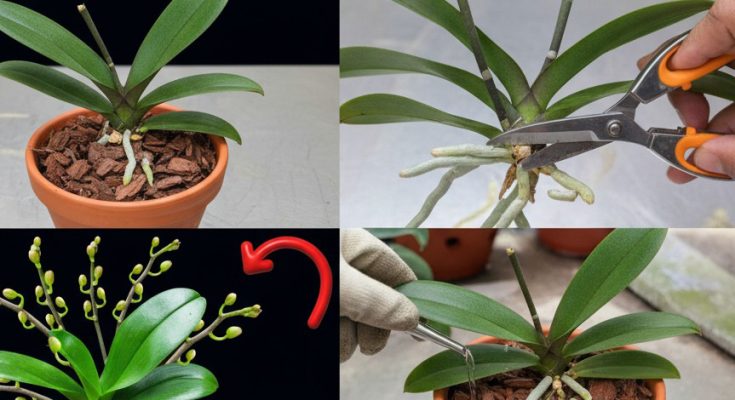
While the turmeric mixture is cooling, I will begin preparing the orchids by removing them from their original pots. I take off the orchid bags and carefully prune the branches. It is essential to cut orchid branches whose flowers have completely fallen off, especially if they have turned yellow. Cutting them from the base encourages new growth.
Upon examining the topsoil, I notice it is slightly moldy, which is often a result of excessive watering. Overwatering is one of the most common mistakes made in orchid care, so it is crucial to avoid leaving them in water for extended periods.
Step 3: Filtering the Turmeric Solution
Now that the turmeric mixture has cooled, I strain it to remove any sediment at the bottom. This step is important because any remaining sediment could stick to the orchid roots, potentially causing issues. Instead of discarding the leftover sediment, you can add more water to it and use it as a natural fertilizer.
To make the turmeric solution suitable for orchid care, I dilute it further by adding 800 ml of water to the strained turmeric juice, making a total of 1 liter of fertilizer.
Step 4: Disinfecting the Orchids
I place the orchids in a large bowl and begin the disinfection process. First, I submerge the leaves in the turmeric solution for about 10 seconds, repeating this process three times to ensure thorough absorption. This step helps eliminate any bacteria or fungi present on the leaves.
Next, I submerge the roots in the turmeric solution, gently turning them to allow full absorption. The orchids remain in this mixture for about 30 minutes. This method is highly effective in eliminating any diseases or insects that may be present on the roots while providing additional nourishment.
Step 5: Repotting the Orchids
After disinfecting the orchids, I prepare them for repotting. Choosing the right soil and pot is crucial for healthy orchid growth. I select a transparent pot, as this allows sunlight to reach the roots, promoting better development.
For soil, I use washed pine bark, which is an excellent medium for orchids as it provides proper aeration and drainage. To further enhance drainage, I place pebbles at the bottom of the pot. You can also use clay balls as an alternative.
Next, I evenly distribute the pine bark in the pot, ensuring the orchid roots are well-covered but that the base of the plant remains slightly elevated. This prevents excess water from collecting at the base, which could lead to root rot. Ensuring the roots are positioned towards the edges of the pot allows for better visibility of their hydration levels.
Step 6: Cleaning the Orchid Leaves with Lemon Juice
To further maintain the health of the orchids, I clean the leaves using a natural disinfectant. I squeeze five drops of lemon juice into some water and dip a cotton ball into the mixture. Then, I gently wipe each leaf to remove dust and potential bacteria, promoting a healthier and shinier appearance.
Step 7: Providing Proper Care After Repotting
Now that the orchids are properly potted, they must be placed in a location with plenty of natural light. A well-lit windowsill is ideal for their growth.
Watering should be based on the color of the roots. If the roots appear white, the orchid needs water. However, if they are green, watering is not necessary. Overwatering should be avoided at all costs to prevent root rot. Additionally, liquid plant nutrients can be given once a month to support healthy growth.
Final Thoughts
I have successfully planted and cared for several orchids using these methods, and they have shown remarkable improvement over time. By following these steps, your orchids can grow strong, develop new roots, and eventually bloom beautifully.
If you found this guide helpful, I would be delighted if you could support me by liking this post and subscribing to my channel. Stay tuned for more updates on the progress of my orchids!
