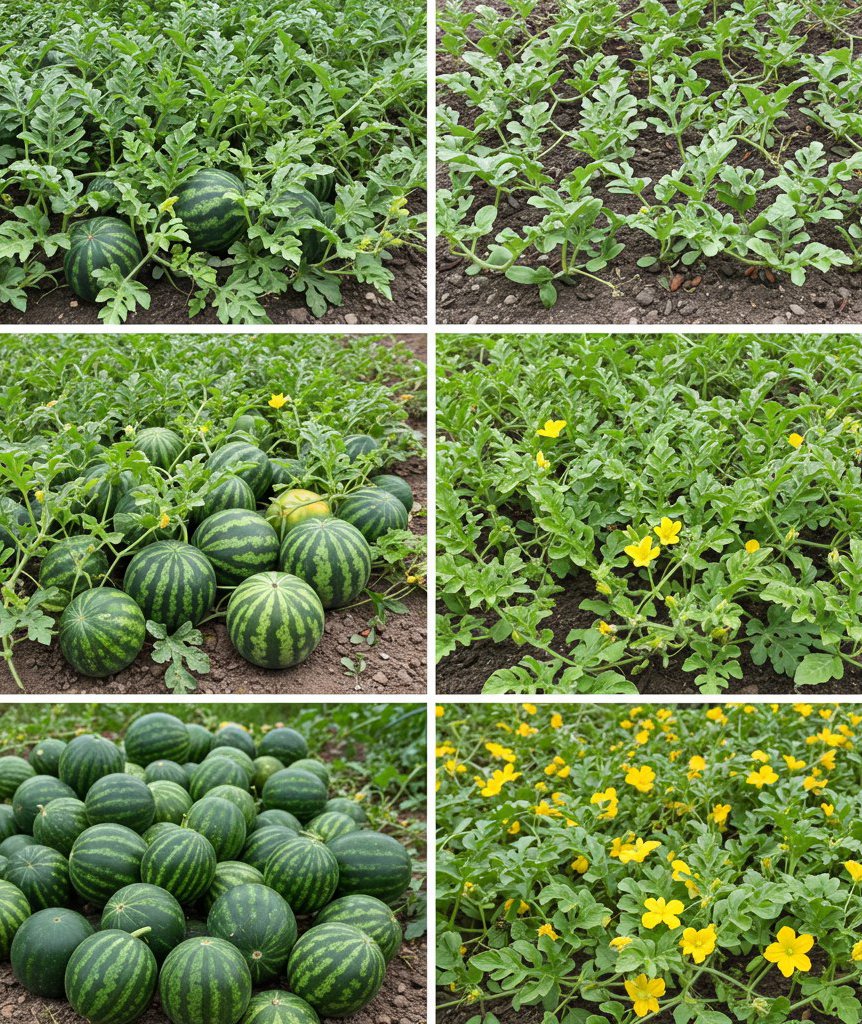
Imagine harvesting your own juicy, sweet watermelons—all starting from seeds you’d normally toss away from store-bought fruit. Growing watermelons at home doesn’t have to be a slow, complicated journey. With the right approach, you can sprout dozens (or even hundreds!) of seedlings in just five days—using seeds from your local supermarket.
Whether you have a sprawling garden or a cozy balcony, here’s a foolproof method to kickstart your watermelon-growing adventure fast and easy.
Step 1: Choose the Right Seeds
Start with a ripe, seeded watermelon from the supermarket (seedless varieties won’t work here). Cut it open, scoop out the seeds, and place them in clean water. Rinse thoroughly to remove any leftover fruit pulp, which can cause mold during germination.
Lay the seeds out on a paper towel to dry in a shaded, ventilated area for 24 hours. This simple step helps prevent fungal growth and preps the seeds for sprouting.
Step 2: Speed Up Germination with Soaking and Paper Towels
Soak your cleaned seeds in warm water for about 12 hours to soften their seed coats and encourage faster sprouting.
Next, dampen a paper towel—make sure it’s moist but not dripping—and spread the seeds evenly over half of it. Fold the towel over, then place it inside a resealable plastic bag or between two plates to keep humidity in.
Store this setup in a warm, dark spot—a kitchen cabinet or atop the fridge works great. Check daily: most seeds will sprout within 3 to 5 days.
Step 3: Transplant Your Sprouts with Care
Once your seeds show tiny white roots about 1–2 cm long, it’s time to move them to soil.
Use small pots or seed trays filled with light, well-draining potting mix. Plant each sprouted seed root-side down in shallow holes (about 1 to 1.5 cm deep). Cover gently with soil and water carefully, keeping the medium moist but not soggy.
Place your seedlings somewhere warm and bright, aiming for at least 6 hours of indirect sunlight daily.
Step 4: Nurture Your Seedlings
As the first true leaves appear, continue to:
-
Provide plenty of light (grow lights help if natural light is low).
-
Maintain even moisture without overwatering.
-
Thin out overcrowded seedlings, removing weaker ones to give space to the strongest.
In just a week, your watermelon babies will be robust and ready to face the outdoors.
Step 5: Hardening Off and Planting Outdoors
Before planting outside permanently, harden off your seedlings by gradually exposing them to outdoor conditions over 7 days. Start with a few hours outside in shade and build up their tolerance to sun and wind.
When temperatures stay consistently above 18°C (65°F) and frost risk is gone, transplant them into your garden or large pots.
Outdoor Growing Tips
-
Spacing: Give each plant about 1 meter (3 feet) to sprawl.
-
Soil: Choose rich, well-drained soil in a sunny spot.
-
Watering: Keep soil moist during flowering and fruiting but avoid waterlogging.
-
Mulch: Apply straw or dry grass around plants to retain moisture and suppress weeds.
With care, your watermelons will flower and fruit within 70 to 90 days.
Final Thoughts: From Trash to Treasure
This quick and easy method lets you grow dozens—or even hundreds—of watermelon plants from seeds you’d usually throw away. It’s a budget-friendly, fun project that turns everyday supermarket scraps into a fruitful gardening success.
Ready to start growing your own sweet watermelons? Grab a watermelon today, and let the magic begin!