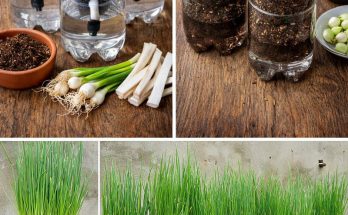
Garlic is a kitchen essential, loved for its bold flavor and numerous health benefits. What many home gardeners don’t realize is that garlic can be grown just as successfully in buckets and containers as it can in the ground. For those who lack garden space, this method offers an easy, space-saving, and highly rewarding way to enjoy fresh, homegrown garlic right at home.
Growing garlic in buckets is straightforward, requiring only a few basic supplies, the right soil, and a bit of patience. Once planted, garlic requires little care and will provide a satisfying harvest in just a few months.
Why Grow Garlic in Buckets?
There are many reasons to try bucket gardening with garlic
-
-
Space-saving: Even with limited space, such as a balcony, patio, or rooftop, you can still produce a bountiful garlic harvest.
-
Pest control: Buckets can be moved around easily, making it simpler to keep garlic away from pests or adjust sunlight exposure
-
Soil control: Container gardening allows you to prepare the perfect soil mix, ensuring good drainage and nutrition for your plants.
-
-
Convenience: You won’t need a large garden bed—just a sturdy bucket and some quality cloves.
With these advantages, growing garlic in containers is practical for both beginners and experienced gardeners
Choosing the Right Bucket
Garlic develops a strong root system and needs sufficient space to grow large bulbs.
-
-
Size: Use a bucket at least 10–12 inches deep and wide. A 5-gallon bucket works well and can accommodate 6–8 garlic cloves
-
-
Drainage: Drill 6–8 holes at the bottom of the bucket to ensure excess water drains freely. Without drainage, garlic roots can rot.
-
Material: Plastic buckets are light and durable, while clay pots allow better airflow but dry out faster. Either option can work as long as you monitor watering
Preparing the Soil
Garlic thrives in rich, loose, well-draining soil. To create an ideal growing medium:
-
Mix equal parts potting soil, compost, and sand or perlite
-
Ensure the soil is fertile, as garlic requires nutrients throughout its growth period.
-
Add a handful of well-rotted manure or worm castings before planting to boost fertility.
Avoid heavy clay soil, which retains too much water and may lead to bulb rot
SelectiSg Garlic for Planting
The type of garlic you choose influences your harvest.
-
Hardneck garlic: Best for cooler climates, produces a flower stalk (scape) and has fewer but larger cloves.
-
Softneck garlic: Better for warmer climates, produces more cloves per bulb and has a longer storage life
Choose fresh, organic garlic bulbs from a nursery or trusted source rather than supermarket garlic, which is often treated with chemicals to prevent sprouting.
Before planting, separate the cloves from the bulb. Keep the papery skin intact and select the largest, healthiest cloves for planting
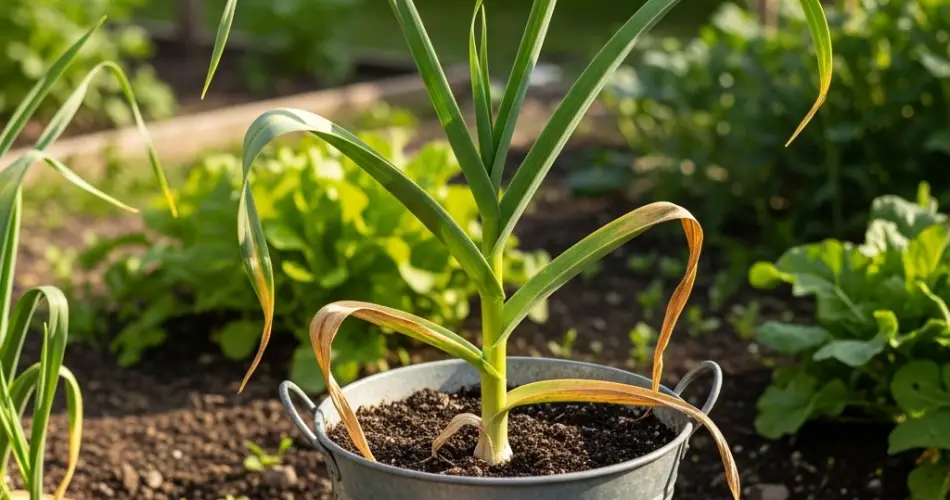
Planting Garlic in Buckets
-
-
Fill the bucket with prepared soil, leaving about 2 inches from the rim.
-
Plant each garlic clove with the pointed end facing up and the flat root end facing down.
-
Space cloves 4–6 inches apart to allow bulbs to grow fully.
-
-
Push each clove 2 inches deep into the soil and cover lightly.
-
Water thoroughly after planting.
For a continuous supply, consider planting multiple buckets at different times of the year
Caring for Garlic
Garlic is a low-maintenance crop but benefits from consistent care:
-
-
Sunlight: Place the bucket where it will receive at least 6–8 hours of sunlight daily. Garlic thrives in bright conditions.
-
-
Watering: Keep the soil evenly moist but not soggy. Water whenever the top inch of soil feels dry. Reduce watering once the leaves begin to yellow, as this indicates the bulbs are nearing maturity.
-
Fertilizing: Apply a nitrogen-rich fertilizer every 3–4 weeks during early growth to encourage strong leaf development. Switch to a potassium-rich feed as bulbs begin to form.
Mulching with straw or shredded leaves can help conserve moisture and keep the soil cool.
Harvesting Garlic
Garlic is usually ready to harvest 8–9 months after planting, depending on the variety and climate. Signs that garlic is ready include:
-
The lower leaves turning yellow and drying out.
-
About half of the plant’s leaves remain green.
To harvest:
-
-
Stop watering 1–2 weeks before harvesting to allow bulbs to firm up.
-
Gently loosen the soil around each bulb and pull them out carefully.
-
-
Lay harvested garlic in a dry, shaded, and well-ventilated spot for 2–3 weeks to cure.
Cured garlic can be stored for several months in a cool, dry place
Final Thoughts
Growing garlic in buckets is one of the easiest and most satisfying projects for home gardeners. It requires minimal space, simple materials, and little ongoing effort. From planting cloves in prepared soil to harvesting plump bulbs months later, the process is highly rewarding.
Whether you’re gardening on a balcony, in a small patio, or even indoors near a sunny window, bucket-grown garlic ensures you have a steady supply of fresh, flavorful bulbs to enhance your cooking. With the added benefit of controlling soil quality and reducing pests, this method is perfect for anyone looking to enjoy the convenience of homegrown garlic year-round.