Potatoes are one of the most widely grown root vegetables in the world, valued for their versatility, nutrition, and high productivity. Yet even experienced gardeners and farmers often struggle to maximize yields. While traditional methods produce decent harvests, there’s a lesser-known approach that can increase potato yield up to fivefold—without expensive fertilizers or machinery.
This article reveals the secret method that can transform your potato harvest, using techniques rooted in soil health, plant nutrition, and strategic planting. Whether you’re a home gardener or a small-scale farmer, applying these steps can significantly enhance your crop quality and quantity.
Selecting the Right Seed Potatoes
The foundation of a productive potato crop lies in high-quality seed potatoes. Always choose certified disease-free seed tubers from reliable sources. Avoid using store-bought potatoes meant for consumption, as they may carry diseases or be chemically treated to prevent sprouting.
Choose varieties that are well-suited to your region’s climate and soil. For high-yield potential, look into fast-maturing and disease-resistant varieties like ‘Yukon Gold,’ ‘Kennebec,’ or ‘Desiree.’
Preparing the Soil: The Hidden Key to Massive Yields
Many growers underestimate the importance of soil preparation. Potatoes thrive in loose, well-aerated, nutrient-rich soil. Compact or poorly drained soil restricts tuber development and encourages disease.
Here’s how to prepare soil for maximum productivity:
-
-
Loosen the soil: Till to a depth of 12–16 inches (30–40 cm) to allow free root expansion.
-
Add organic matter: Mix in plenty of compost or aged manure. This improves structure and provides slow-release nutrients.
-
Ensure proper pH: Potatoes prefer a slightly acidic soil, around pH 5.5 to 6.5. Avoid lime unless your soil is too acidic, as higher pH increases the risk of scab disease.
-
A secret practiced by high-yield growers is incorporating wood ash or rice husk biochar into the soil. This boosts potassium and enhances microbial activity—two essential components for tuber development.
Sprouting (Chitting) for a Head Start
Before planting, sprout your seed potatoes in a cool, bright place for 2–3 weeks. This process, known as chitting, gives the tubers a head start, allowing for quicker growth once in the ground.
Select the strongest sprouts and remove weak or excess ones, leaving 2–3 shoots per tuber. This concentrates the plant’s energy and promotes larger potatoes.
Strategic Planting for Higher Yield
Spacing and depth are critical to optimizing tuber production:
-
-
Spacing: Leave 12–15 inches (30–38 cm) between plants and 24–30 inches (60–76 cm) between rows.
-
-
Planting depth: Bury seed potatoes about 4 inches (10 cm) deep, then gradually mound soil around stems as they grow.
One hidden trick is to plant in deep trenches or containers with room to hill. As the plant grows, you add soil or mulch to cover the lower stems. This encourages more tubers to form along the buried stem sections.
Fertilizing with Purpose
Potatoes are heavy feeders, especially during tuber formation. A balanced approach using organic and mineral-based fertilizers ensures robust growth:
-
-
Early stage (leaf growth): Use a nitrogen-rich mix like compost tea or fish emulsion.
-
-
Mid to late stage (tuber development): Switch to high-potassium, moderate-phosphorus sources like wood ash, banana peel compost, or 5-10-10 NPK blends.
The yield-boosting secret many overlook is supplementing with Epsom salt (magnesium sulfate) during the early growth stage. Magnesium enhances chlorophyll production, improving photosynthesis and overall plant vigor. Apply 1 tablespoon per gallon of water and use as a foliar spray or soil drench every 10–14 days.
Smart Irrigation Practices
Consistent moisture is vital, especially during tuber formation. However, overwatering can lead to rot. Aim to:
-
-
Keep soil moist but not waterlogged.
-
-
Water deeply once or twice a week, depending on rainfall and temperature.
-
Use mulch to retain moisture and suppress weeds.
Drip irrigation or a soaker hose works best for even water distribution and reduces fungal risk.
Pest and Disease Management
Common potato pests include aphids, beetles, and nematodes. Use natural deterrents such as neem oil, diatomaceous earth, or garlic sprays. Rotate crops every season to avoid soil-borne diseases like blight and wilt.
Interplanting with marigold or beans can deter pests and improve soil fertility through nitrogen-fixing.
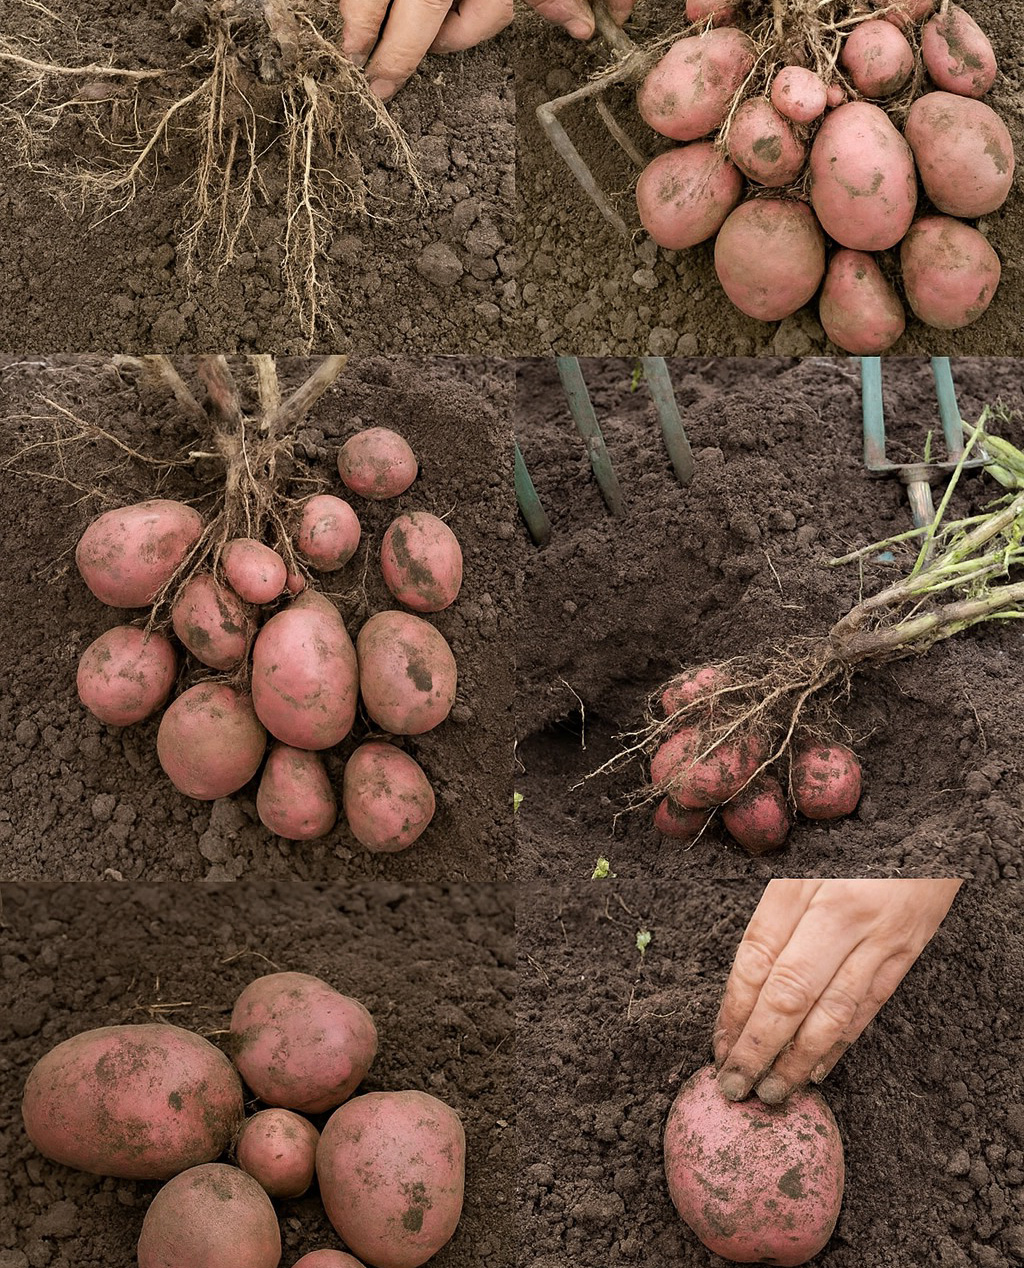
When and How to Harvest
Once the foliage begins to yellow and die back, usually 90–120 days after planting (depending on the variety), your potatoes are ready to harvest. Gently dig around the base with a fork to avoid damaging the tubers.
Let the harvested potatoes cure in a cool, shaded, well-ventilated area for a few days. This toughens the skin and extends shelf life.
Final Thoughts
The secret to dramatically increasing potato yield lies in a combination of soil preparation, proper spacing, nutrient timing, and strategic plant care. By applying these lesser-known yet proven techniques, growers can multiply their harvests—sometimes up to five times more than traditional methods.
The results speak for themselves: bigger yields, healthier plants, and more rewarding harvests for anyone willing to take their potato-growing game to the next level.