Why Grow Mint in Water?
Growing mint in water has several advantages:
-
- Low Maintenance: No need to worry about watering or soil conditions.
-
- Space-Saving: You can grow it in hanging bottles, window sills, or any small space.
- Continuous Growth: Mint grows quickly and can be harvested multiple times.
- Pest-Free: Growing mint in water minimizes exposure to soil-borne pests and diseases.
- Eco-Friendly: Reusing plastic bottles helps reduce waste and promotes sustainable gardening.
Materials Needed
To grow mint in plastic bottles with water, you will need:
-
- Fresh mint cuttings (from an existing plant or store-bought sprigs)
-
- A plastic bottle (1- or 2-liter size works well)
- Clean water (preferably filtered or rainwater)
- Scissors or a sharp knife
- A needle or nail to make small holes (optional, for air circulation)
- Liquid plant nutrients (optional, for faster growth)
Step-by-Step Guide
Step 1: Preparing the Plastic Bottle
-
- Choose the Right Bottle: A clear plastic bottle allows you to monitor root growth.
-
- Cut the Bottle: Using scissors or a sharp knife, cut the top portion of the bottle. You can either:
- Remove the top completely and use the lower half as a container.
- Keep the top and invert it into the bottom half, creating a self-watering system.
- Cut the Bottle: Using scissors or a sharp knife, cut the top portion of the bottle. You can either:
- Make Drainage Holes (Optional): If you prefer some air circulation, use a needle or nail to make small holes around the bottle.
Step 2: Preparing the Mint Cuttings
-
- Select Healthy Cuttings: Choose a mint stem that is 4-6 inches long with at least 4-5 healthy leaves.
- Remove the Lower Leaves: Trim the bottom leaves, leaving the top few intact. This prevents leaves from rotting in water.
- Make a Clean Cut: Cut the stem at a 45-degree angle to encourage better water absorption.
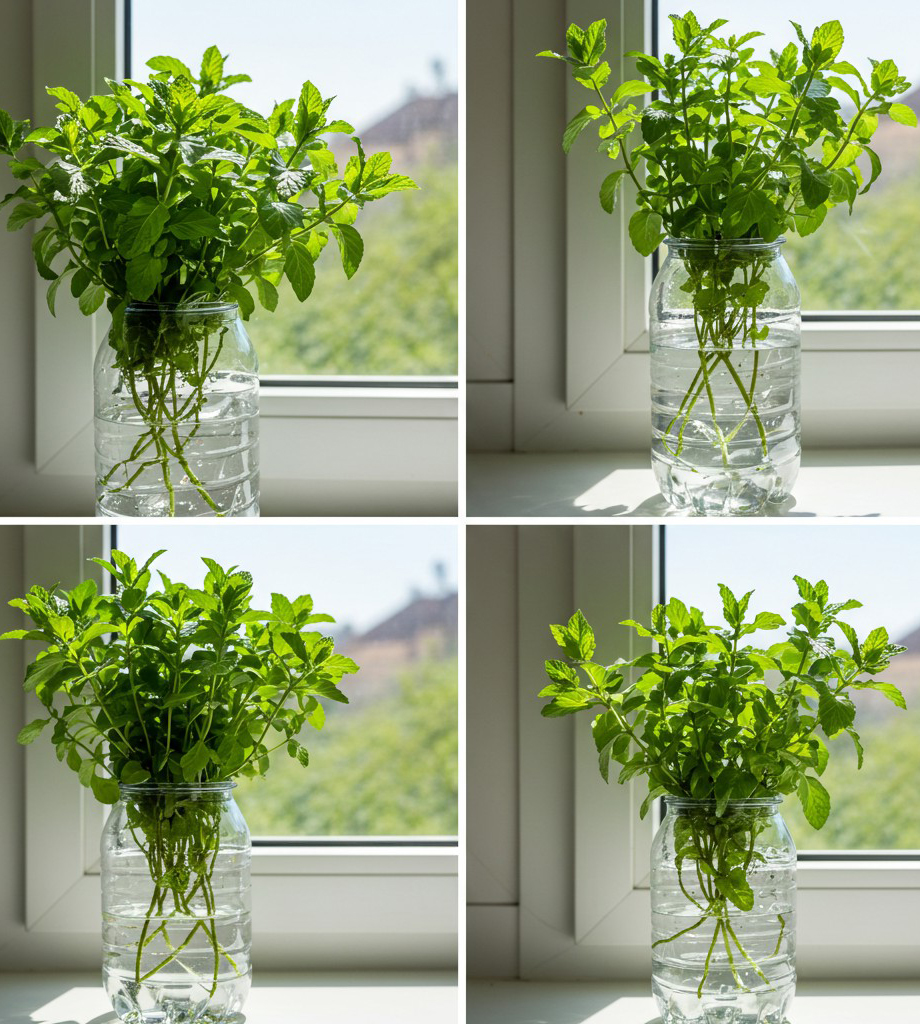
Step 3: Placing the Mint in Water
-
- Fill the Bottle with Water: Use clean, room-temperature water (filtered water is best).
- Insert the Mint Cuttings: Place the cuttings in the bottle so that the bottom nodes are submerged in water.
- Position the Bottle: Keep the bottle in a well-lit area but away from direct sunlight to prevent overheating.
Step 4: Caring for the Mint Plant
-
- Change Water Regularly: Replace the water every 3-5 days to prevent bacterial growth and provide fresh oxygen.
- Monitor Root Growth: Within 7-14 days, you should see roots forming.
- Add Liquid Nutrients (Optional): For faster growth, add a few drops of liquid plant nutrients once every two weeks.
- Trim and Harvest: Regularly trim the mint to encourage bushier growth and prevent it from becoming leggy.
Step 5: Transplanting (Optional)
If you wish to transfer your mint plant into soil after rooting, follow these steps:
-
- Prepare a Pot or Garden Space: Use well-draining soil.
- Plant the Rooted Cuttings: Bury the roots in the soil and water lightly.
- Continue to Care: Water regularly and ensure the plant gets indirect sunlight.
Tips for Success
-
- Use Multiple Cuttings: To ensure a continuous supply of mint, start multiple cuttings at once.
- Avoid Stagnant Water: Change water frequently to prevent algae growth.
- Use Clear Bottles for Monitoring: This makes it easy to check root health.
- Harvest Frequently: Regular harvesting promotes new leaf growth.
Conclusion
Growing mint in plastic bottles with water is an easy, cost-effective, and sustainable way to enjoy fresh herbs at home. This method requires minimal effort and space while providing a continuous supply of aromatic mint leaves for teas, salads, and cooking. Try it today and experience the joy of homegrown mint with this simple water-based technique!