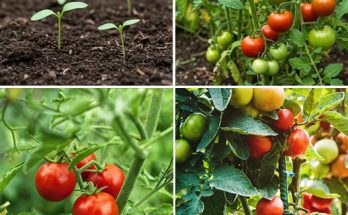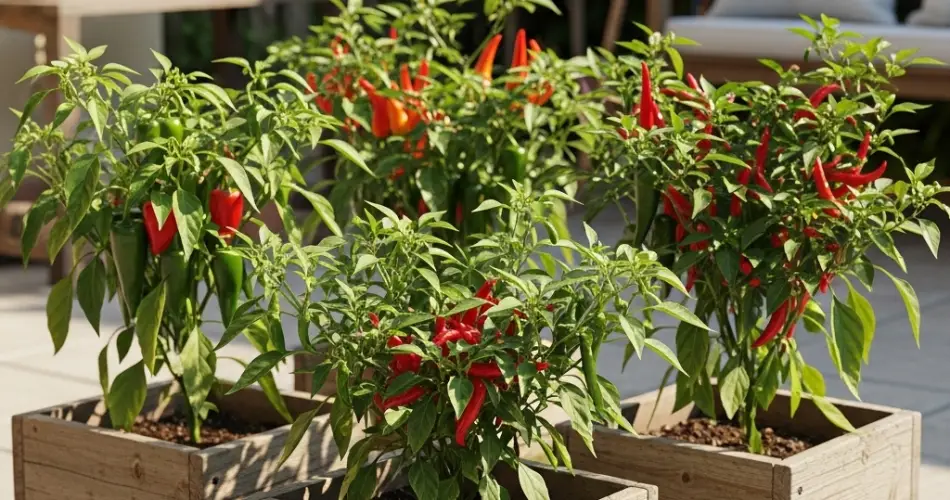
Chili peppers are one of the most exciting crops to grow at home. They are vibrant, full of flavor, and can be enjoyed fresh, dried, or preserved. From fiery hot varieties to sweet and mildly spicy ones, peppers add personality to any dish. The good news is that you don’t need a sprawling garden to cultivate them. Growing chili peppers in rustic wooden containers is not only practical but also stylish, making it possible to transform patios, balconies, and small backyards into productive spaces. This guide will walk you through the step-by-step process of raising healthy chili plants in wooden boxes.
Step 1: Selecting the Right Wooden Container
The success of your chili pepper plants begins with the container you choose.
-
-
Depth and size: Chili peppers develop strong root systems. Select a wooden box that is at least 12–16 inches deep and 14–18 inches wide. Each plant will need adequate space, so don’t overcrowd them.
-
Drainage: Proper drainage is essential. Drill several holes at the bottom of the box to prevent waterlogging, which can cause root rot.
-
-
Material: Choose untreated wood like cedar or pine. If using reclaimed crates, line them with landscape fabric or burlap to hold soil while maintaining drainage.
A rustic wooden box adds charm to your growing space while also providing the durability needed to support a productive pepper plant.
Step 2: Choosing Chili Pepper Varieties
One of the joys of growing peppers is the wide variety available. For container gardening, compact and productive varieties are best.
-
-
Mild to medium heat: Varieties like Jalapeño and Poblano are excellent for cooking and easy to grow in containers.
-
-
Hot and fiery: Cayenne, Thai chilies, or Habanero bring heat and thrive in confined spaces with good care.
-
Decorative varieties: Some compact peppers, like Bolivian Rainbow or Numex Twilight, produce colorful fruits that double as ornamental plants.
Choose according to your taste preferences and how you plan to use the harvest.
Step 3: Preparing the Soil
Chili peppers thrive in rich, well-draining soil.
-
-
Soil mix: Use high-quality potting soil combined with compost for added nutrients.
-
Drainage enhancers: Adding perlite, coco coir, or coarse sand prevents compaction and improves airflow to the roots.
-
-
pH preference: Aim for a slightly acidic to neutral soil, between 6.0 and 7.0, for optimal growth.
Healthy soil is the foundation for robust plants that produce abundant fruits.
Step 4: Planting Seeds or Seedlings
You can start peppers from seeds or buy seedlings for a quicker head start.
-
-
Starting from seeds: Sow seeds ¼ inch deep in the soil. Keep the soil moist and warm until germination, which usually takes 7–14 days.
-
-
Using seedlings: Transplant them into your wooden container once they have at least 4–6 true leaves.
-
Spacing: For medium-sized wooden boxes, plant one to two pepper plants to give them ample room to spread.
Transplant carefully to avoid disturbing roots, which are sensitive during early growth.
Step 5: Watering and Feeding
Chili peppers need consistent care to thrive in containers.
-
-
Watering: Keep the soil evenly moist, but avoid overwatering. Wooden containers dry faster than garden beds, so check moisture levels daily. Water deeply when the top inch of soil feels dry.
-
Fertilization: Start with a balanced fertilizer during the early growth phase. Once flowering begins, switch to a fertilizer higher in potassium and phosphorus to encourage fruiting. Organic options like compost tea or seaweed extract are excellent for sustainable feeding.
-
Step 6: Sunlight and Temperature Requirements
Chili peppers love warmth and sunshine.
-
Sunlight: Place your wooden container where it gets at least 6–8 hours of direct sunlight daily.
-
Temperature: Ideal daytime temperatures range between 70°F and 85°F (21°C to 29°C). Protect plants from temperatures below 55°F (13°C), as growth slows in cooler weather.
If your space is too shady, consider using reflective surfaces to maximize light exposure.
Step 7: Supporting Growth and Managing Pests
As your chili pepper plants mature, they may need a little extra support and protection.
-
-
Staking: Taller varieties may require small stakes or cages to keep branches upright as they bear heavy fruit.
-
Pruning: Remove yellowing leaves and pinch off weak side shoots to encourage airflow and stronger fruit production.
-
Pest control: Watch for aphids, whiteflies, and spider mites. Neem oil sprays or insecticidal soaps can help control infestations naturally.
-
Healthy plants are more resistant to diseases and pests, so maintain consistent care.
Step 8: Harvesting Chili Peppers
Harvesting is one of the most rewarding steps.
-
-
Timing: Depending on the variety, peppers mature within 60–90 days after transplanting.
-
-
Green or ripe harvests: You can harvest peppers while they are still green for a milder flavor or wait until they turn red, orange, or yellow for maximum heat and sweetness.
-
Cut, don’t pull: Use scissors or garden shears to cut peppers off the plant, preventing damage to stems.
Chili peppers can be enjoyed fresh, dried, pickled, or frozen, giving you plenty of ways to savor your harvest year-round.
Final Thoughts
Growing chili peppers in rustic wooden containers is both practical and rewarding. With the right container, nutrient-rich soil, adequate sunlight, and consistent care, your plants will flourish and provide a steady supply of vibrant, flavorful peppers. Wooden boxes not only make efficient use of limited space but also add a charming, rustic touch to your garden. Whether you’re after a mild kick or a fiery burst of heat, you can enjoy homegrown chili peppers right outside your door.