Too Easy! Recycle Old Bags to Grow Ginger at Home for Many Tubers
Ginger is a versatile and flavorful root used in cooking, tea, and natural remedies. While it is widely available in stores, growing your own ginger at home is incredibly easy and rewarding. Even better, you don’t need a garden or special equipment—just an old bag, some soil, and a little patience. This method of recycling old bags to grow ginger not only reduces waste but also provides an efficient way to cultivate an abundant harvest in a small space.
If you want to grow fresh, organic ginger without the hassle of large garden beds, follow this simple guide to growing ginger in recycled bags and enjoy a plentiful yield of tubers right at home.
Why Grow Ginger in Recycled Bags?
Using old bags to grow ginger offers several advantages:
-
- Space-Saving: Bags can be placed on balconies, patios, or even indoors near a sunny window.
- Cost-Effective: No need for expensive pots or garden beds—just reuse old rice sacks, shopping bags, or burlap sacks.
- Portable and Flexible: You can move the bags to adjust to sunlight conditions and protect the plants from extreme weather.
- Better Drainage Control: By adding drainage holes, you prevent waterlogging and root rot.
- Sustainable and Eco-Friendly: Repurposing old bags reduces plastic waste and promotes sustainable gardening.
What You Need to Grow Ginger in Bags
To get started, gather the following materials:
-
- An old bag (rice sacks, woven plastic bags, or sturdy shopping bags)
- Ginger rhizomes (preferably organic, as non-organic ones may be treated to prevent sprouting)
- Well-draining potting soil mixed with compost
- A knife or scissors (for drainage holes)
- Watering can
- Mulch or dried leaves (to retain moisture)
- A sunny location (ginger prefers partial to full sun)
Step-by-Step Guide to Growing Ginger in Recycled Bags
1. Choosing the Right Ginger Rhizomes
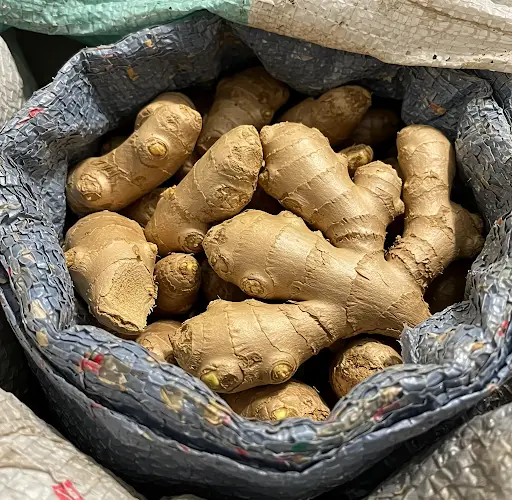
Select fresh, plump ginger rhizomes with visible “eyes” or small buds. These buds are where new shoots will emerge. Organic ginger is best, as store-bought non-organic ginger is sometimes treated with growth inhibitors.
2. Preparing the Ginger for Planting
Before planting, soak the ginger rhizomes in water overnight to encourage sprouting. If you have large rhizomes, cut them into smaller pieces, ensuring each piece has at least one eye.
3. Preparing the Bag
Take an old bag and poke several small holes in the bottom to allow excess water to drain out. Fill the bag with well-draining soil mixed with compost, leaving a few inches of space at the top.
4. Planting the Ginger
Lay the ginger pieces horizontally on the soil surface, with the buds facing upward. Cover them with about 2 inches of soil and gently pat down. Avoid planting them too deep, as this can slow sprouting.
5. Watering and Sunlight Requirements
-
- Water the soil lightly to keep it moist but not soggy.
- Ginger thrives in warm temperatures (above 70°F or 21°C) and prefers partial to full sunlight.
- If growing indoors, place the bag near a sunny window or use a grow light.
6. Mulching for Moisture Retention
Cover the soil with a layer of mulch, such as dried leaves or straw, to help retain moisture and prevent weeds. Mulching also helps regulate soil temperature and encourages steady growth.
7. Caring for the Ginger Plant
-
- Water Regularly: Keep the soil consistently moist but avoid overwatering to prevent root rot.
- Fertilize Monthly: Use a balanced organic fertilizer or compost tea every few weeks to boost growth.
- Remove Weeds: Since ginger grows slowly, weeds can compete for nutrients. Check the bag regularly and remove any weeds.
- Protect from Extreme Weather: If temperatures drop below 50°F (10°C), move the bag indoors or to a sheltered spot.
8. Watching for Growth
After a few weeks, you’ll see green shoots emerging from the soil. Ginger grows slowly, so be patient. In about 4-6 months, the plant will reach full maturity, with tall green leaves resembling bamboo.
9. Harvesting Your Homegrown Ginger
Ginger can be harvested at different stages:
-
- Young Ginger (3-4 months): Tender with a mild flavor, perfect for fresh use.
- Mature Ginger (8-10 months): Has a thicker skin and stronger flavor, ideal for drying and storage.
To harvest, gently dig around the base of the plant and remove the rhizomes. You can also harvest small sections while leaving the rest to continue growing.
10. Reusing and Replanting Ginger
After harvesting, save a few rhizomes for replanting. Simply repeat the process using the same bag, replenishing the soil with compost.
Tips for a Bigger and Better Ginger Harvest
-
- Use Large Bags: More space allows for better root expansion and a bigger harvest.
- Rotate the Bag’s Position: Ensure even sun exposure for consistent growth.
- Avoid Overcrowding: Give each rhizome enough space to spread underground.
- Keep Soil Loose: Compacted soil can hinder rhizome development.
- Add Organic Matter: Enrich the soil with compost or banana peel fertilizer to boost nutrients.
Final Thoughts
Growing ginger at home using recycled bags is an easy, sustainable, and rewarding gardening method. Not only do you reduce waste by reusing old bags, but you also create the perfect environment for a bountiful ginger harvest. With minimal effort, you can enjoy fresh, organic ginger right from your home, whether on a balcony, patio, or small backyard. Try this method today and enjoy the benefits of homegrown ginger!