Reviving Orchids with Root Rot and Yellow Leaves: A Step-by-Step Guide
Orchids are beautiful and delicate plants, but they can sometimes suffer from root rot and yellowing leaves. If you’ve ever found your orchid looking wilted, with wrinkled and lifeless leaves, don’t worry! You don’t have to throw away your plant in despair. With the right care and techniques, you can bring your orchid back to life.
After 45 days of using this method, my orchids have developed strong new roots and regained their health. Let’s go through the entire process of reviving an orchid that seems to be on the verge of dying.
Step 1: Assess the Orchid’s Condition
Begin by closely examining your orchid. In this case, my orchid was severely wilted, with yellowing and wrinkled leaves. If left untreated, the plant would eventually dry up and die.
The first step is to remove the orchid from its pot and check the condition of its roots. Root rot is a common problem in orchids, often caused by overwatering or fungal infections. Rotten roots appear mushy, dark brown or black, and break easily when touched. Healthy roots, on the other hand, should be firm and green or light-colored.
Step 2: Remove the Damaged Parts
If you find that your orchid has infected roots, you must remove the unhealthy parts to prevent further spread. Follow these steps:
-
- Use sterilized scissors to trim off all rotten, withered, or blackened roots.
- Cut off any yellow or wrinkled leaves, as they will not recover and may spread disease.
- Gently remove any old potting media attached to the roots to allow for better ventilation.
At this point, your orchid may look quite bare, but don’t worry! This step is necessary to give it the best chance of revival.
Step 3: Prepare a Natural Antifungal Solution with Garlic
Garlic is a powerful natural antibiotic that helps kill fungi and prevent rot in orchids. Here’s how to make a garlic-based treatment:
Garlic Solution Recipe:
-
- Take two cloves of garlic and chop them finely using a mortar and pestle.
-
- Add 200ml of boiled and cooled water to extract the garlic’s beneficial compounds.
- Let the mixture sit for a few minutes, then strain it to separate the liquid from the garlic pulp.
- Pour the garlic juice into a spray bottle for easy application.
Step 4: Disinfect the Orchid
Once your garlic solution is ready, spray it thoroughly on the entire orchid, covering the leaves, stems, and any remaining roots. This will help eliminate harmful fungi and bacteria.
Alternatively, if you don’t have time to prepare the garlic solution, you can use alcohol (at least 70%) to disinfect the orchid. Simply dampen a cotton pad with alcohol and wipe down the leaves, ensuring any potential pathogens are removed.
Step 5: Set Up a Mini Greenhouse for Recovery
Now that the orchid is disinfected, it needs a stable environment to encourage new root growth. One of the most effective ways to revive a dying orchid is by using a water recovery method combined with a mini greenhouse setup.
How to Set Up a Mini Greenhouse:
-
- Take a clear plastic cup or container and fill it with boiled and cooled water.
- Place the orchid upside down so that the base is just above the water surface. The humidity from the water will help stimulate root growth.
- If your orchid is too large, use two plastic cups or cut the top of a plastic bottle to create a custom greenhouse.
- Cut small holes in the upper part of the cup/container to allow for air circulation and prevent excess moisture buildup.
- Place the setup in a cool, well-ventilated area with indirect light.
This method helps create a humid microclimate around the orchid, encouraging it to sprout new roots without the risk of further rot.
Step 6: Monitor the Orchid’s Progress
Over the next few weeks, check on your orchid regularly. Avoid exposing it to direct sunlight or overwatering, as the plant is still in a fragile state.
After about 45 days, you should start to see new roots emerging. The yellowing leaves will stop deteriorating, and the remaining leaves will become firmer and greener. If your orchid is responding well, you can prepare to repot it.
Step 7: Repotting the Revived Orchid
Once the orchid has developed strong, healthy roots, it’s time to repot it in a proper growing medium.
How to Repot the Orchid:
-
- Disinfect the leaves again with alcohol to ensure there are no remaining pathogens.
- Choose a potting medium such as sphagnum moss, charcoal, or pine bark to provide good aeration and moisture retention.
- If using a plastic pot, punch small drainage holes to prevent water buildup and allow proper air circulation.
- Gently place the orchid into the new pot, making sure the roots have enough space to grow.
- Water sparingly for the first few days, then resume normal watering once the plant stabilizes.
Final Results After 2 Months
After repotting, continue monitoring your orchid’s growth. By two months, your orchid should be fully recovered:
-
- New roots will have developed, anchoring the plant firmly in the pot.
- The leaves will be greener, thicker, and stronger, indicating the plant’s overall health.
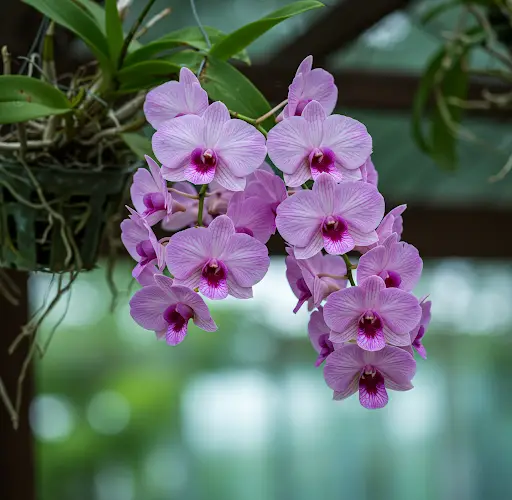
- If cared for properly, the orchid will eventually start producing new leaves and flower spikes, ready for its next blooming cycle.
Conclusion
Reviving an orchid with root rot or yellowing leaves may seem daunting, but with patience and proper care, it’s entirely possible. By following these steps—removing damaged parts, disinfecting with garlic, setting up a mini greenhouse, and repotting the plant—your orchid can make a full recovery and thrive again.
This method has saved many of my orchids, and I hope it works for you too. If you’ve tried this technique, share your success stories! Happy orchid growing!